GridView with CheckBox – Select All and Highlight Selected Row


Introduction
To enable row selection in GridView, we can either include a Button control or CheckBox control. For example, selecting a row item to delete. Using CheckBox control will give a better user experience than a Button control and it is user friendly when we require multiple row selections. We can include checkbox in every row of GridView to enable selection of that particular row. To do this, we need to include a TemplateColumn that has a CheckBox control inside it. To enable “Select All” feature, we can include a checkbox inside the HeaderTemplate, which will give better experience than a Button control. Moving forward, this article will help us doing it from client side JavaScript Code.

When the user selects a CheckBox in a row, we can highlight the row by changing the row’s background color using JavaScript. Also, when the user clicks the checkbox in the header, we can select all the checkbox in the gridview. Refer the below figures.

Row Selection

Select All

Constructing GridView
Declare a GridView control with a TemplateColumn as the first column to include CheckBox control. Include BoundField for other fields to display in the GridView.

<asp:GridView ID="gvUsers" runat="server" AutoGenerateColumns="False" BackColor="White" BorderColor="#010101" BorderStyle="Groove" BorderWidth="1px" CellPadding="4">
<Columns>
  <asp:TemplateField HeaderText="Roles">
     <HeaderTemplate>
         <asp:CheckBox ID="chkAll"onclick="javascript:SelectAllCheckboxesSpecific(this);" runat="server" />
     </HeaderTemplate>
      <ItemTemplate>
        <asp:CheckBox onclick="javascript:HighlightRow(this);" ID="chkDelete" runat="server" />
     </ItemTemplate>
   </asp:TemplateField>
 <asp:BoundField DataField="Email" HeaderText="Email" ReadOnly="True" />
 <asp:BoundField DataField="FirstName" HeaderText="First Name" ReadOnly="True" />
 <asp:BoundField DataField="LastName" HeaderText="Last Name" ReadOnly="True" />
</Columns>
<FooterStyle BackColor="White" ForeColor="#330099" />
<RowStyle BackColor="White" ForeColor="#330099" />
<HeaderStyle BackColor="#F06300" Font-Bold="True" ForeColor="#FFFFCC" />
</asp:GridView>

To highlight the selected row, we will have JavaScript function called HighLightRow() and call this function on onclick event of the CheckBox in ItemTemplate.
Refer the below JavaScript function which does that.
function HighlightRow(chkB)
{
var IsChecked = chkB.checked;           
if(IsChecked)
  {
       chkB.parentElement.parentElement.style.backgroundColor='#228b22'; 
       chkB.parentElement.parentElement.style.color='white';
  }else
  {
       chkB.parentElement.parentElement.style.backgroundColor='white';
       chkB.parentElement.parentElement.style.color='black';
  }
}


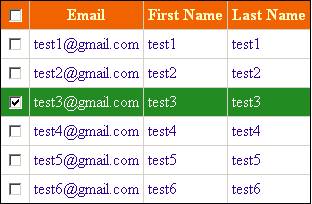
Enabling Select All
If we see the rendered output of the GridView, it will be rendered as a HTML Table with ID as GridView ID.
Refer the below output.

<table cellspacing="0" cellpadding="4" rules="all" border="1" id="gvUsers" style="background-color:White;border-color:#010101;border-width:1px;border-style:Groove;border-collapse:collapse;">
              <tr style="color:#FFFFCC;background-color:#F06300;font-weight:bold;">
                     <th scope="col">
                            <input id="gvUsers_ctl01_chkAll" type="checkbox" name="gvUsers$ctl01$chkAll" onclick="javascript:SelectAllCheckboxesSpecific(this);" />
                        </th><th scope="col">Email</th><th scope="col">First Name</th><th scope="col">Last Name</th>
              </tr><tr style="color:#330099;background-color:White;">
                     <td>
                            <input id="gvUsers_ctl02_chkDelete" type="checkbox" name="gvUsers$ctl02$chkDelete" onclick="javascript:HighlightRow(this);" />
                        </td><td>test1@gmail.com</td><td>Babu</td><td>B</td>
//Goes on

So, we will first find the table from the rendered HTML and get all the checkbox inside table to check/uncheck depending on the state of the CheckBox control in header. Refer the below JavaScript function which selects all the checkbox inside the GridView when the Header CheckBox control is checked.

function SelectAllCheckboxesSpecific(spanChk)
       {
           var IsChecked = spanChk.checked;
           var Chk = spanChk;
              Parent = document.getElementById('gvUsers');          
              var items = Parent.getElementsByTagName('input');                         
              for(i=0;i<items.length;i++)
              {               
                  if(items[i].id != Chk && items[i].type=="checkbox")
                  {           
                      if(items[i].checked!= IsChecked)
                      {    
                          items[i].click();    
                      }
                  }
              }            
       }

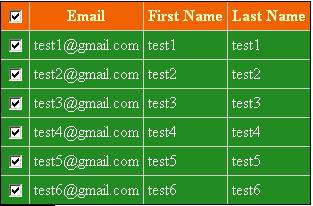
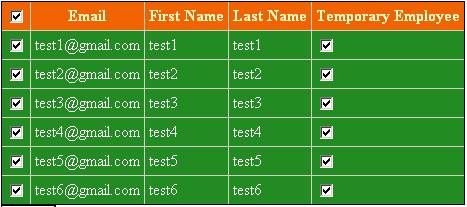
Executing the page and see it in action.
Since, we are getting all the elements with tag name as “input”, the above code will check/uncheck the other CheckBox controls if present in any other column of the GridView control. To understand it better, include a checkbox at the last and execute the page. It will Check/Uncheck for the actions you do in the Header CheckBox. If you don’t have another checkbox control in the GridView, the above JavaScript code will work fine.
Refer the below figure.


To handle the above scenario with multiple CheckBox, we will change the code bit to check/uncheck the CheckBox control found based on the column location instead of checking all the CheckBox in the GridView. If we see the rendered HTML table, we have the checkbox at every first TD of the table. We will find the checkbox in every first TD and perform the required action. The below code does that.

function SelectAllCheckboxesMoreSpecific(spanChk)
       {
           var IsChecked = spanChk.checked;
           var Chk = spanChk;
              Parent = document.getElementById('gvUsers');                                                   
              for(i=0;i< Parent.rows.length;i++)
              {     
                  var tr = Parent.rows[i];
                 //var td = tr.childNodes[0];                                  
                  var td = tr.firstChild;         
                  var item =  td.firstChild;                     
                  if(item.id != Chk && item.type=="checkbox")
                  {           
                      if(item.checked!= IsChecked)
                      {    
                          item.click();    
                      }
                  }
              }            
       }

Configure the onclick event of header checkbox to point to the above JavaScript function.
The above code assumes the checkbox will be the first column of every row in the GridView. If the GridView have the selection CheckBox as the last column, then change the line which is bolded above to var item =  td.lastChild;
This code will work perfectly even if there are CheckBox controls present in any other column of the GridView control.

We can include a button that deletes the selected row,

protected void btnDelete_Click(object sender, EventArgs e)
    {
        for (int i = 0; i < gvUsers.Rows.Count;i++ )
        {
            CheckBox chbTemp = gvUsers.Rows[i].FindControl("chkDelete") as CheckBox;
            if (chbTemp.Checked)
            {
                Response.Write(gvUsers.Rows[i].Cells[1].Text + "<BR>");
                //Code for Deletion

            }
        }
    }

I took the example to delete the selected rows; it can be any operation that is specific to your requirement that can be done on the selected rows.

Download Source
Conclusion
Using CheckBox control to enable selection of a single row and selection of all the rows is a common task that we will do GridView control. This article will help you doing the same with JavaScript in client side. Download the source attached with this article.
Thanks for reading this article.

0 comments:

Post a Comment